For years my mom would get an annual Southern Living Christmas idea book ~ did anyone else grow up with those hardback books around their house? I remember her setting up the card table in our family room, making homemade gifts and decorations late into the night using ideas she got from those books. One year when I was in middle school we found an idea to make cookies that looked like a piano keyboard...I have played the piano since I can remember, and upon seeing the photo wanted to give them to my music teachers. I remember her helping me make those cookies.
I now have a few of those old books and like to browse them when Christmastime rolls around. The other day I was looking at the 2003 edition and saw an idea I remembered seeing years ago. It was to make a "Southern Snowman" using grapevine wreaths. My husband helped me put it together on the stoop outside our front door, and this snowman is just too cute!
Jimmy wired the three grapevine wreaths together and hung the snowman on the house. I threw one of my scarves on him, set out an old pair of rubber fireman boots from Trevor's preschool days that I couldn't bear to part with, and cut a hat out of chalkboard crafting paper.
And just like that we had built a snowman, right down here in the South!
A glimpse into the life of a real family - ours. We're busy. Sometimes crazy busy. Occasionally, life gets chaotic. But we love each other deeply. God is first in our lives, and then each other. There is laughter and love and beauty in this home we share. And as I journey this somewhat chaotic life with the family I love, there are moments when I have to sit back, take a sip of my coffee with extra cream, and smile as I realize something very valuable...I am content.
Showing posts with label creativity. Show all posts
Tuesday, December 17, 2013
Thursday, October 4, 2012
When Toilet Paper Rolls And Cupcake Liners Become Adorable Little Owls
When my most recent issue of Family Fun magazine came in the mail, I was immediately drawn to one of the projects. For one, it was kid friendly. Two, it involved owls. Three, it was made from cupcake liners which we have tons of around here! Four, I could make it with everything we already had around the house. Here is what these little owls looked like when completed...
I mean, how cute are those?! My friend and her daughter made them with Madi and me this past Friday evening. We had the best time crafting together! You have got to sit down with the girls (or little guys) in your life and make some!
The base of this owl is simply a toilet paper roll (talk about upcycling)! Just fold in the center of the roll and adhere it with a little glue to keep it in place.
Then cut a cupcake liner into fourths to make feathers, or use quarters of different cupcake liners if you want to mix it up. We used fun, girly patterns I had left over from Madi's cupcake birthday party. Fall colors and patterns would be perfect too!
Starting at the bottom, glue four quarters on the roll to make feathers.
Then cut another liner in half and trim it slightly to make the wings. Just glue them on the back of the roll.
Then use a triangle of orange paper for a nose, or do what we did and use a snip of an orange pipe cleaner.
Done! So cute, so easy, so much fun!!
If you have a spare miniature Christmas tree around, you could make several of these and put them in the branches for an adorable autumn tree! Again, fall themed cupcake liners would be great. You could even make them with Halloween cupcake liners to make a Halloween tree! Oooh, now that's an idea I may have to steal from myself.... ;)
Thursday, September 27, 2012
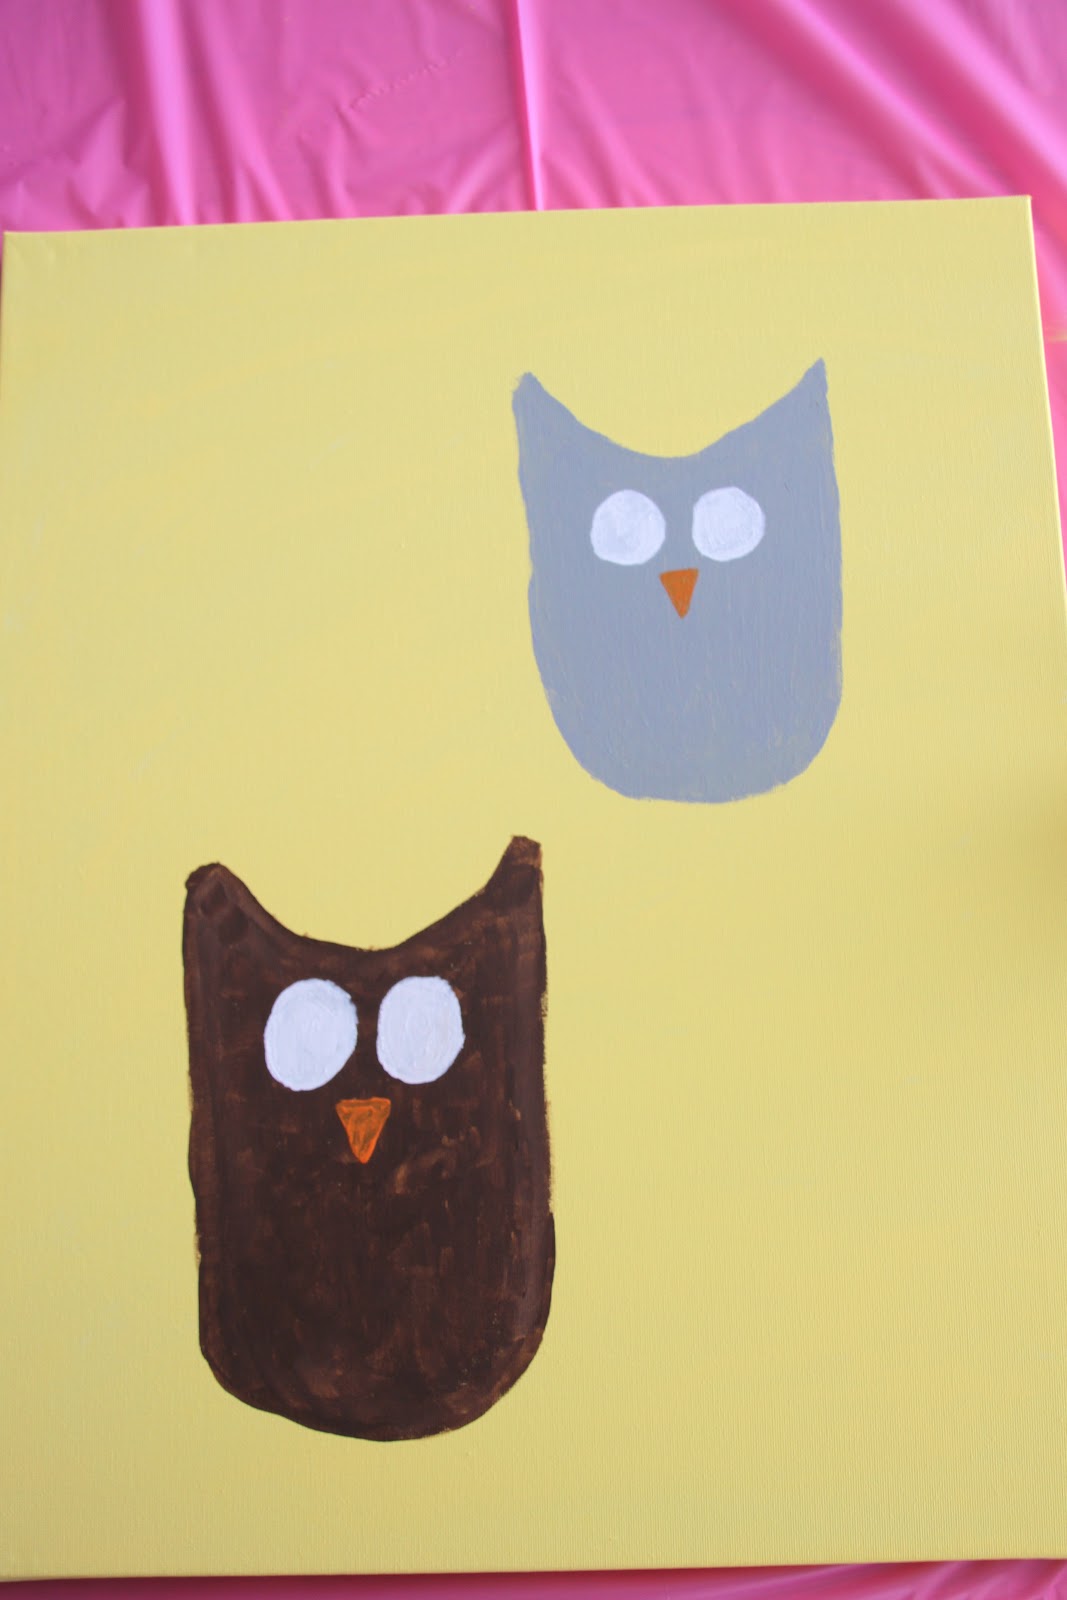
Homemade Handprint Owl Art
And I really love it! It was incredibly easy. I started by painting the canvas yellow (my favorite color) and painting owl forms, one brown and one gray.
I then painted white circles for eyes and orange triangles for beaks.
I added dots in the center of the eyes for pupils, and painted two simple branches for the owls to perch on.
Then came the fun part. I used Trevor's handprints to make green feathers on the gray owl, and Madi's handprints to make orange feathers on the brown owl.
Our handmade, handprinted artwork is now a charming addition to our autumn nest!
Jimmy hung it up in that empty space and it fits perfectly! Now I have the sweetest view from my green chair! After we made our owl art, Madi also painted a picture for her teacher, who loves owls and decorates their classroom with them. It was just precious and painted with much, much love.
It is now hanging on the wall of her classroom!
Speaking of classrooms, I spent my morning subbing in 4th grade.
My entire afternoon teaching back to back piano and vocal lessons.
And my evening at church for band practice.
I'm a tired girl!
So, goodnight! Sleep tight! Do something creative with your kiddos this weekend to add color to your home! They'll feel so special being a part of it.
Thursday, August 16, 2012
The Wheels On The Bus Just Keep Turning...
If you've followed my blog for awhile, you may know that the past two Augusts, Madi and I have made a school bus cake as a fun way to get geared up for kindergarten and first grade. It has been a sweet tradition and I realized on Sunday afternoon just how much it has meant to her when I said we were going to do a project and she responded with, "Is it the school bus cake? Yessssss!!!"
In the past we have made this a special Mommy-Madi project, but this year we let Trevor join the fun since I blinked and it is time for him to leave his long days at home with Mommy and short mornings at Pre-K behind for all day kindergarten.
Kindergarten. I am still trying to say that word without feeling my eyes well with tears! But despite the way my heart feels, we must celebrate. So on a gray and cloudy afternoon after church and lunch with friends, the three of us gathered around the table and made both a cake and a memory.
If you'd like to do something to welcome the upcoming school year, this is a very simple (and tasty) project! I originally received the idea in an email from the Disney Family website. You use two store bought loaf cakes to make the bus shape. You can use the Entenmann's brand, but the Publix brand was buy one/get one free so I used them instead and they worked perfectly.
I simplified things a bit this year, using lemon frosting instead of vanilla (already yellow), and sandwich cookies instead of donuts for the tires (less messy).
Use frosting to attach the two cakes, then frost the entire thing except for the windshield. I ended up needing only one can of frosting, but had purchased two just in case.
After the bus is frosted, use dabs of frosting to attach sandwich cookies to the bottom cake for wheels.
Then comes the fun part - let the kids make faces on Vanilla Wafers for the people on the bus! They love doing this!
Attach the Vanilla Wafer people with more dabs of frosting, then add any details you'd like to your bus. It will be ready before you know it and turns out so cute!
Trevor made this little guy in the back window of the bus. He put him there and then told me, "That's Trevor, looking back at Mommy."
Now, why did he have to go and say something so adorable and sooooo saddddd???!!! Oh, my heart!
Honestly, I am excited for this school year. I found out he was put with a wonderfully gifted teacher who is a fine Christian woman as well. He will be going to an excellent school and is sure to grow leaps and bounds. They change so much once they start school - it is amazing to watch. And school is so much fun! The adventures await! Plus, I will continue to volunteer and am going through the process of getting certified to be a substitute teacher at their school, so I will be around.
But a chapter is closing. A chapter that though not glamorous, highly esteemed in society, or awarded with paychecks and accolades, has been the most fulfilling and rewarding of my life. A chapter I once thought would never end that has now flown by, causing me to try and hold on to these last glorious pages. A chapter filled to overflowing with love and brimming with moments of joy, creativity, laughter, and learning that I will hold onto for the rest of my life. A chapter that sometimes seemed so complicated but in reality was marked by a beautiful simplicity.
It's time for him to go.
But when that little boy looks back at Mommy, he will know something without a shadow of a doubt, because she has told him a thousand times.
That if all the boys in the whole world were in a line and she could only pick one boy...
She would pick him.
Sunday, July 29, 2012
A Crabby Craft
Friday, Madi and I had some fun making a crabby handprint craft! I found the inspiration on this website, and took it from there. This was a fun project to make because I have a fondness for all things crab. I grew up in Maryland, and summer seemed to officially kick off when you had a leisurely crab feast with family and friends on the bay or in someone's backyard. There is nothing like a table clothed in brown paper or newspaper and covered with hot steaming crabs and shrimp, Old Bay Seasoning, vinegar, butter, and fresh corn on the cob from Maryland's Eastern Shore!
To make our little crab, we started with an 8 x 10 canvas. I covered Madi's hands in red paint, and she used them to form the crab's body.
I then sponged on some neutral paint to make sand.
And added some strokes of blue to make water.
The crab's cute little eyes and happy smile were added with a paint pen, and then we were done! It dried quickly and was so cute I really wanted to keep it!
But we decided to surprise my parents with this little handmade work of summer art. They too have a fondness for all things Maryland crab - my mom even puts out crab dishes in the summer!
They had recently treated us to two nights at the beach so we could makes some summer memories with them as a family. It was a quick but very fun visit, and we wanted to say thank you.
So Madi and I made a little thank you note, and left our crabby craft at their house while they were out.
They loved it, of course! A happy crab and a granddaughter's handprints are pretty hard to resist! But I think Madi and I may have to make another one this week to keep because it was super easy and turned out so cute!
A summer memory made with my daughter that reminds me of summer memories past.
Enjoy these moments and soak up the last couple weeks of sand, sun, and freedom!
And if you are in Maryland...eat some crabs drenched in Old Bay for me!
Tuesday, July 3, 2012
Independence Day Handprint Project!
In preparation for Independence Day, the kids and I made a fun project. The idea came once again from the Disney Family Fun site, and you can find the exact link right here. The idea was to use handprints to make a bald eagle t-shirt, but today the little hands in our home made bald eagles on chalkboard craft paper instead. I love how these turned out!
We started by following the exact instructions from the website to form the eagle using their hands, fingers, and fists. They then painted on the eye and beak, and got busy embellishing their projects with star stamps. Madi even stamped the words "liberty and justice for all" on hers.
The kids also started the morning watching the American Girl movie Molly: An American Girl on the Home Front. Molly's character lives during World War II, and the movie showed the personal sacrifices families made when loved ones went to war to fight for freedom. We hadn't watched it in quite some time, and it gave me a good opportunity to share with Madi and Trev for a minute how we honor these sacrifices and celebrate our freedom on the Fourth of July.
If you are looking for an easy patriotic project to do with your little ones tomorrow, this is a great one!
I hope you and yours enjoy celebrating the land of the free and the home of the brave!
God bless America, our home sweet home!
We started by following the exact instructions from the website to form the eagle using their hands, fingers, and fists. They then painted on the eye and beak, and got busy embellishing their projects with star stamps. Madi even stamped the words "liberty and justice for all" on hers.
The kids also started the morning watching the American Girl movie Molly: An American Girl on the Home Front. Molly's character lives during World War II, and the movie showed the personal sacrifices families made when loved ones went to war to fight for freedom. We hadn't watched it in quite some time, and it gave me a good opportunity to share with Madi and Trev for a minute how we honor these sacrifices and celebrate our freedom on the Fourth of July.
If you are looking for an easy patriotic project to do with your little ones tomorrow, this is a great one!
I hope you and yours enjoy celebrating the land of the free and the home of the brave!
God bless America, our home sweet home!
Saturday, February 11, 2012
Super Easy DIY Valentine T-Shirt!
A dear lady we know in Maryland gave us a subscription to Disney's Family Fun magazine as a Christmas gift. Our first issue arrived a few weeks ago and had some darling ideas, including this easy way to make fun Valentine t-shirts. I knew Madi would love this and she is at that age where she loves to match Mommy, so I found two pink tees at Walmart for around $3 each and got busy.
First I used a strip of double sided tape to adhere heart doilies to the shirts.
Then I got my paint and foam brush ready. I used textured glittery paint, but you can use whatever kind of fabric paint you would like.
I used the doily as a stencil and dabbed on the paint.
Then I carefully peeled off the doily. It looked like this.
I took the tube of paint and following the stenciled dots, added another dot of paint on top of each one.
I let them dry for a day or two and when finished, the heart stencil and paint gave the shirts this really subtle, sparkly, watermark effect. I was very excited with how they turned out!
The lighting made it a bit hard to fully see the hearts in these photos of us wearing them, but I think you'll get the idea.
I surprised Madi with these after school one day and she absolutely loved them! Such a simple, affordable project.
And this cute heart chalkboard? Found it for $2.50 in the Target value section! I'm always looking for new ways to say I love you.
Linking to...
Labels:
creativity,
homespun,
shoestring budgets,
Valentine's Day
Subscribe to:
Posts (Atom)